NLP Training and Labeling Best Practices
Intro
Your bot launched - Congratulations 🎊! You’ve probably set up a bunch of intents with samples and hopefully created some classes and slots to make those intents even smarter. Now comes the fun part: looking at what your users are actually saying and assessing how well your bot is responding to real user questions. We’ll cover best practices for training and labeling below and, as always, feel free to reach out to your customer success manager or refer to the rest of the Knowledge Base for more information.
Labeling
Once you’ve launched your bot, it’s important to start tracking not just how many utterances your bot captures and responds to, but how many it captures and responds to correctly. A correct response is one in which the bot does more than just capture a user’s intent; it must also accurately map the user’s intent to the correct response.
The labeling tool (in the NLP section) allows you to take 3 primary actions: mark something as “Correct”, mark something as “Incorrect”, and “Ignore” an entry if it’s not relevant to your experience.

From left to right: Correct, Incorrect, and Ignore
Besides the labeling actions themselves, the labeling table consists of 3 columns: a real sample of what a user has said (“Free Text Entered”), a timestamp (“When”), and what the bot responded with (“Triggered Intent”).
In some cases you may need more information than what these three columns provide: you can click on the free text entered to open up a transcript of that user’s entire conversation, or click on the intent to view all of the samples in that intent as well as what response is sent.

Clicking on either the sample or the intent will reveal more information about each.
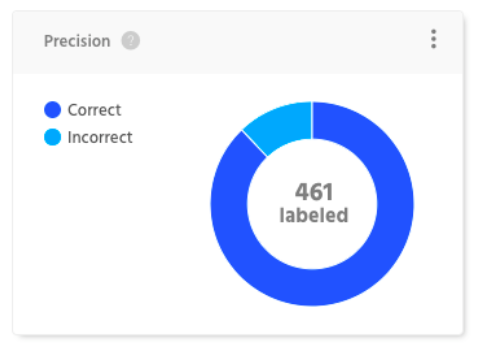
By using the labeling tool from the get-go (we recommend labeling a minimum of 100 samples a week, however this can vary greatly depending on the size of your experience) you’ll begin creating a benchmark for precision that will allow you to measure and improve your accuracy over time.

The precision report can be found in the Free Text section of your analytics.
If you’re not exactly sure how the NLP model for your experience works, labeling is a great way to add impact and value without the risk of messing up your NLP 👍
Training
While labeling is great for measuring precision over time, and it’s true you can’t improve what you can’t measure, labeling itself won’t improve the accuracy of your bot, and that’s where training comes in.
The training tool looks much like the labeling tool with a few key differences:
- The first major difference is that the training tool shows what intent is currently simulated whereas the labeling table shows what the bot responded with at the time the free text was entered. The reason for this is to prevent you from performing redundant work while training: it’s possible that your NLP has improved since the time your bot responded, and we want to ensure that you’re given the most up to date information. You can simulate how your bot responds at any point by using the “Simulate” button at the top of the training tool.
- The second major difference is you have the ability to actually add free text samples to an intent from the training tool. This way, if you see that your bot is responding incorrectly, you can select the correct intent from the “assign” dropdown and press the “add to intent” button

In the example above, a user asked to “Talk to a human” and no intent was triggered. So we’re using the dropdown on the right hand side to select the correct intent to respond with.
What to avoid
At its simplest, the training tool is fairly straightforward: see how your bot responds to real user inquiries, check them off if they’re correct, ignore them if they’re not relevant, and add them to an intent if you’d like your bot to respond to similar entries going forward. However, it’s easy to make mistakes and actually cause regressions in your NLP. We’ll cover the major reasons that training sometimes has an adverse impact below:
###Adding samples that are too long or contain too many unrelated words or phrases:
Not all samples are created equal and it’s important to use your judgment when adding a sample to an intent:

In this case, the above sample is relatively short and contains lots of words related to our “Order Return” intent, making it a good candidate to add. ✅

This example is probably not a good candidate to add to out “Order Return” intent as it contains unrelated words (greg, christmas) and incorrect spelling & typos that could lead to false positives or more misunderstanding by our NLP ⛔️
Adding a sample to an intent without properly tagging necessary slots & classes:
This is another common mistake we see when training bots that oftentimes leads to your NLP actually performing worse than it did before. Whenever an intent uses lots of slots and classes (i.e. a hotel search, a clothing search, a ticket search, etc.) it’s important to make sure that you have an understanding of how they’re used in each intent:

While this user is clearly trying to perform a product search, if the proper slots and classes aren’t tagged this sample will potentially have a negative impact on the product search intent. ⛔️

What we should do instead is use the “edit” button that appears next to each entry in order to properly highlight where slots are being used. This allows our bot to know that it should look for the highlighted class values in these locations and ensure that we capture any and all similar product searches (i.e. a user saying “I want to buy yellow shoes”) ✅
Updated about 1 year ago
