Acquisition Sources
Acquisition Overview
On the primary navigation, head over to 'Compose' and then select 'Acquisition Sources' in the secondary menu. Click the plus button to create a new acquisition source.
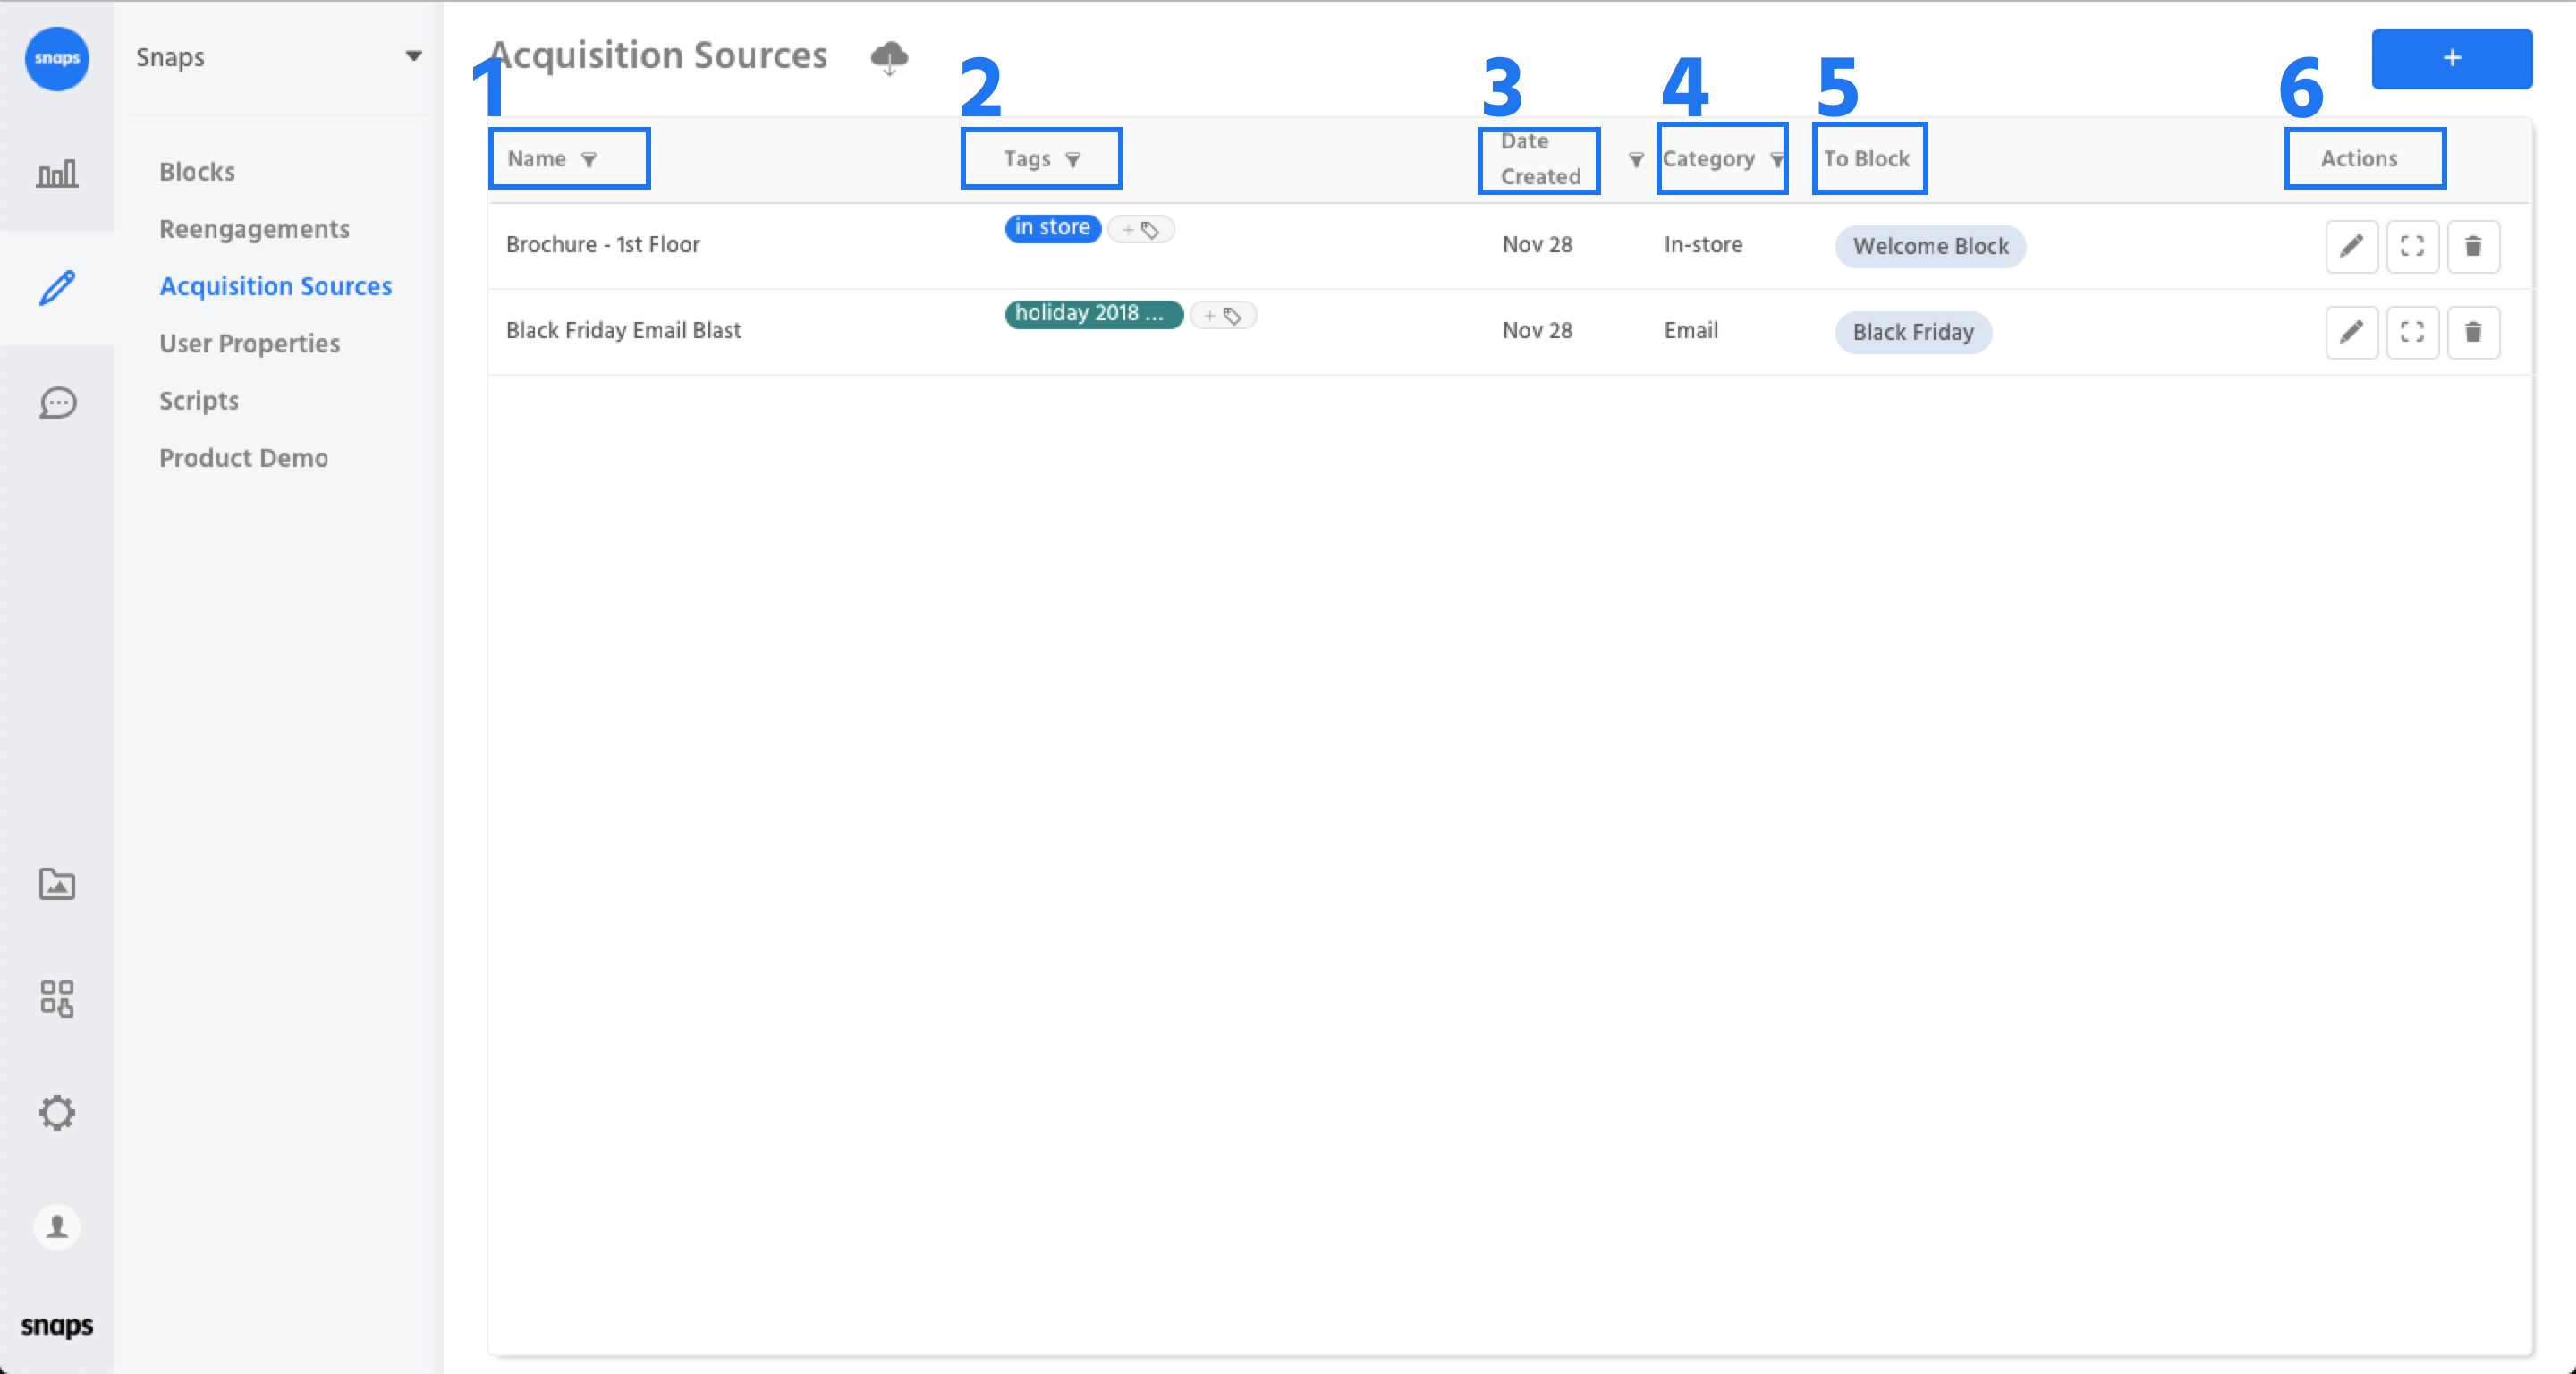
1. Name - The name of your acquisition source.
2. Tags - The Tags applied to your acquisition source.
3. Date Created - The date the acquisition source was created.
4. Category - The category the acquisition source belongs to. Categories are important for grouping your acquisition sources in analytics.
5. To Block - The block users will be sent to.
Components of an Acquisition Source
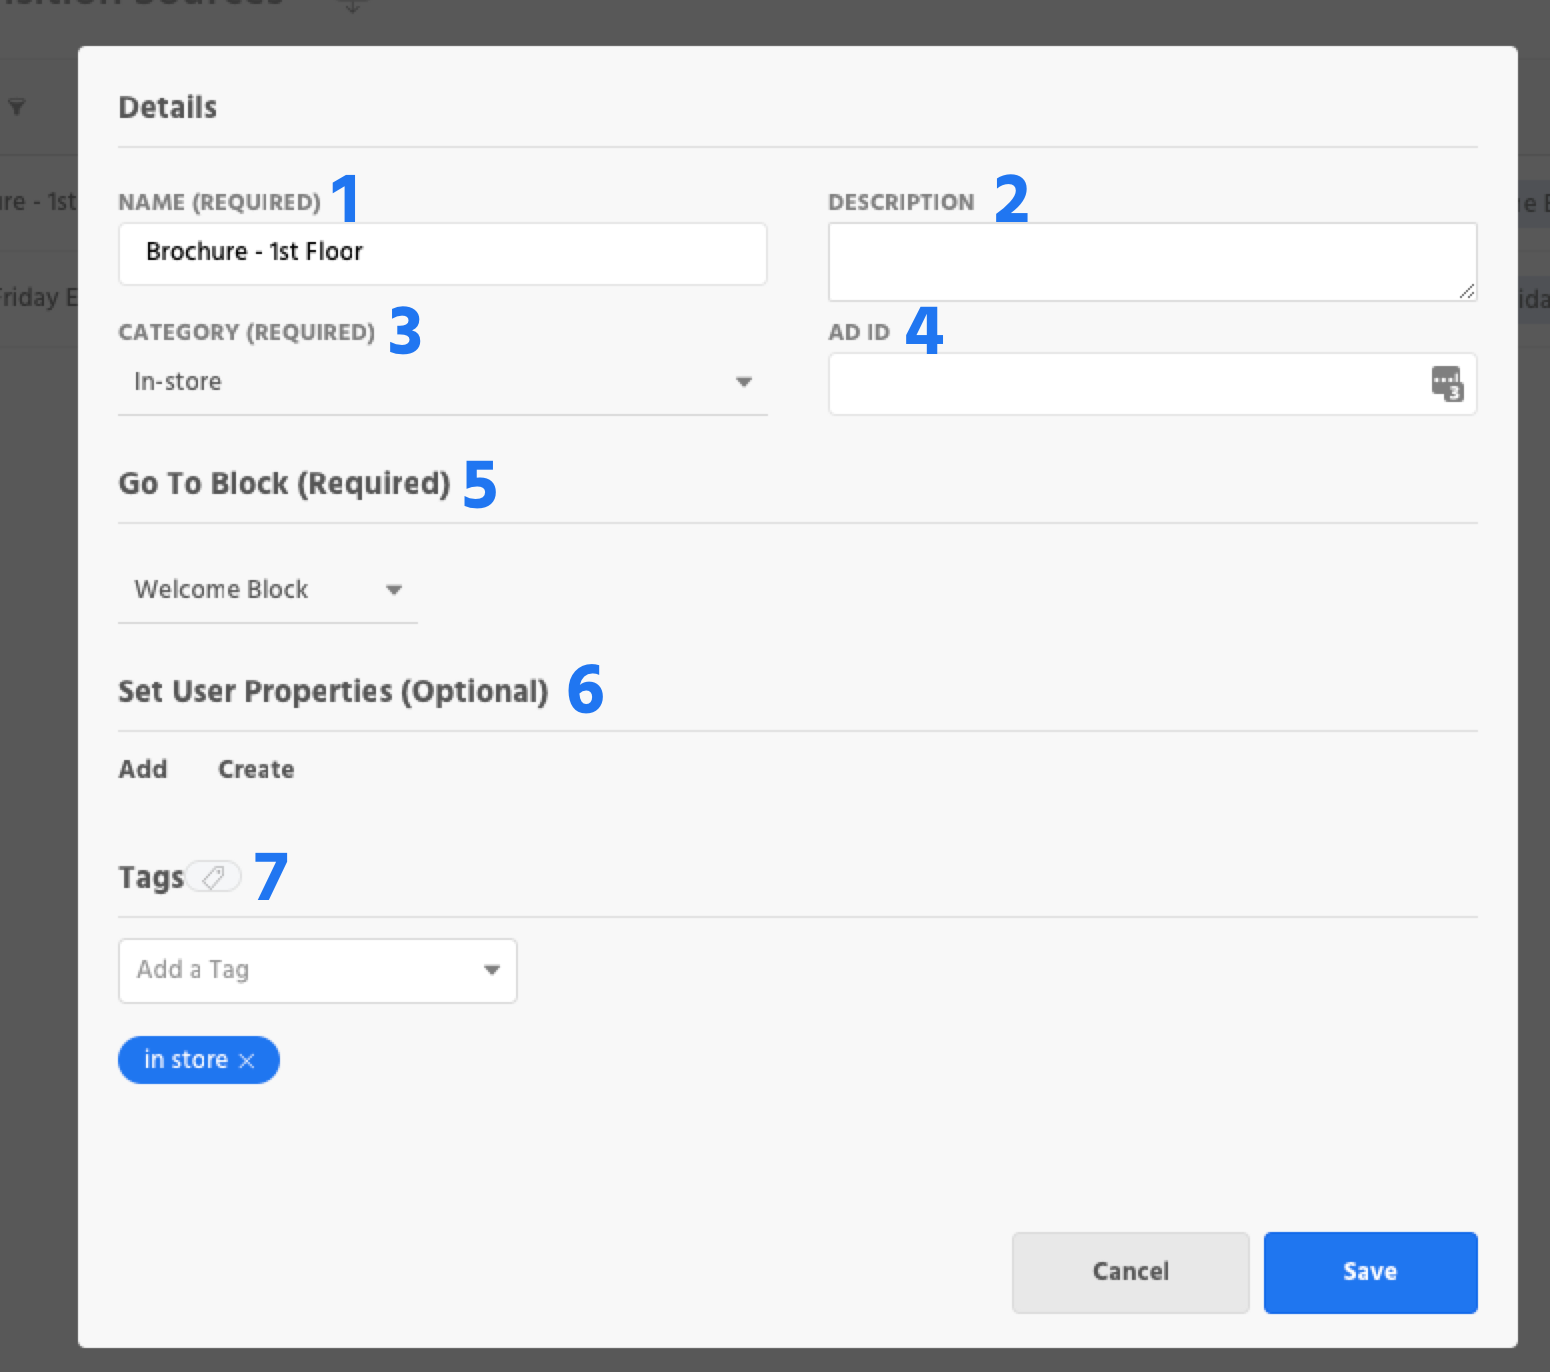
1. Name - Title what you are tracking.
2. Description (Optional) - A description helps others understand where this it's being used.
3. Category - Categories are important so that you can view analytics for a group of acquisition sources. Learn more about how categories work in analytics.
4. Ad ID (If applicable) - If you are using this acquisition source for a corresponding Facebook Ad, it is important to fill out the Facebook Ad ID. This ensures that the source can be mapped to a Facebook Ad, otherwise the user will be marked as having come from an 'Unknown Acquisition Source'. Learn about how media users are tracked in analytics, and how to create an [ad strategy](doc:(doc:user-acquisition-1).
5. Go to Block - When a user comes in through a source, Snaps checks to see which block that acquisition source is linked to and sends the user to that block.
6. Set User Properties (Optional) - Decide which user properties you’d like to automatically set on users who come through an acquisition source. For example, if you’re targeting people whose favorite sport is football with this source, you can set a user property of “favorite sport” to “football”.This gives the bot useful information which you can use to personalize content. Learn more about user properties here.
7. Tags (Optional) - Utilize tags on acquisition sources so you can segment by users who come in through a specific tag. This is especially useful for acquisition sources that are being used for ads - if you have dozens of ad units running, it can be helpful to tag them appropriately. Learn more about tags here.
Using Acquisition Sources
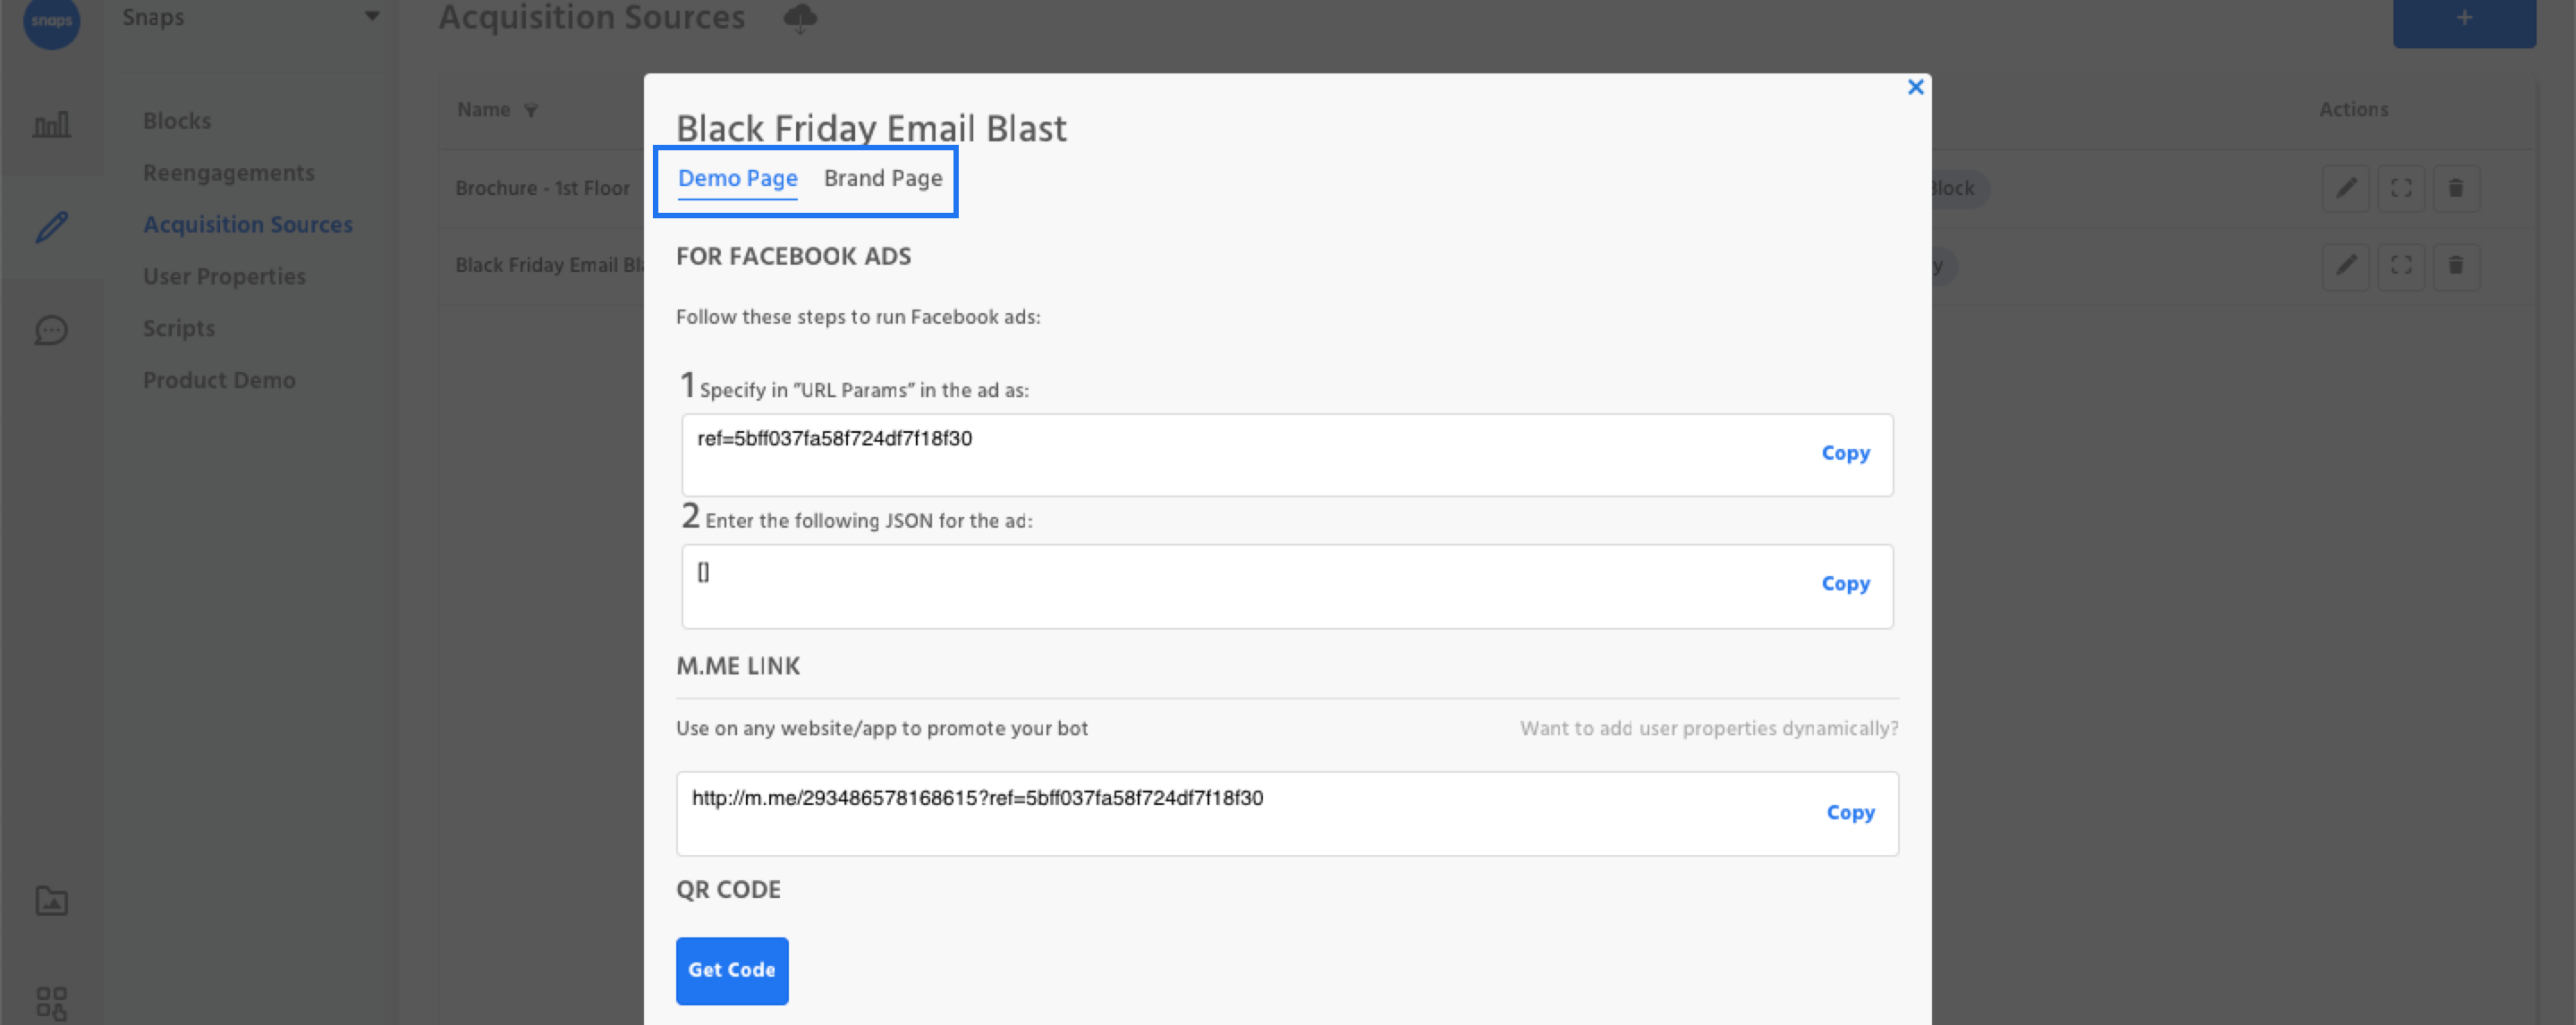
Once you have saved your source, select the “Code” button to get your m.me link, parametric code, and ad JSON.

Testing Acquisition Sources
You can set up your acquisition sources to point to a block in a demo environment first if you'd like to test your experience before deploying it to a live audience. To learn more about demo and brand environments, refer to our publishing documentation.
Selecting a Channel
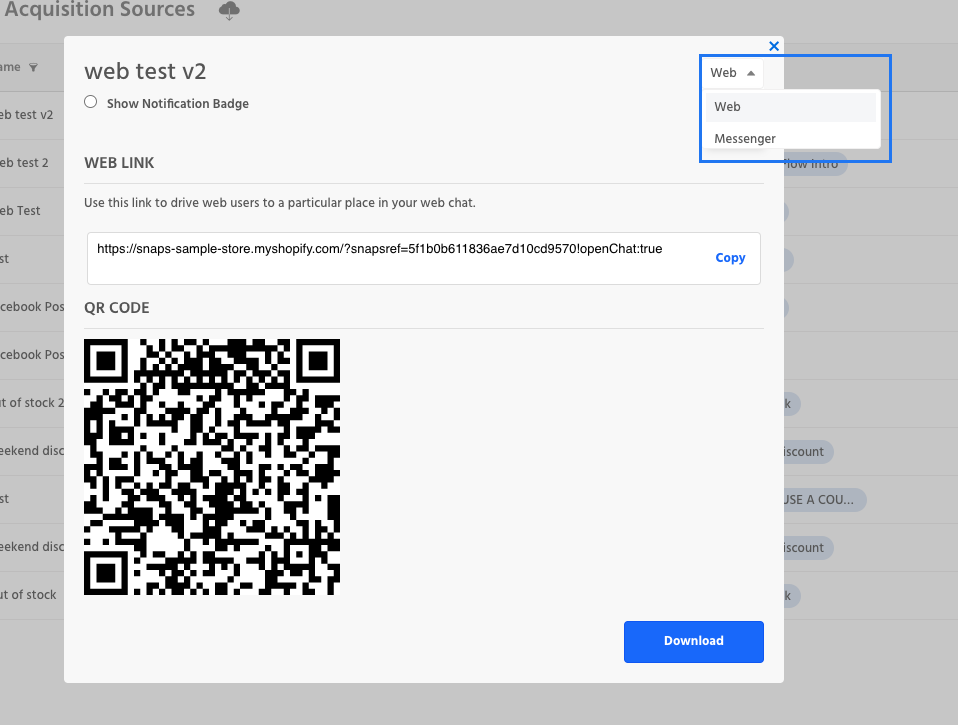
You can run your Acquisition Source across a number of different message channels. You'll see a dropdown in the top right corner of the "Get Code" modal that will give you the option run your acquisition sources on the channels you've configured in the Channels section.
Acquisition Sources on Web
When using an Acquisition Source that drives to your web chat you have control over how a user sees the block they're being sent to. We'll run through both options below.
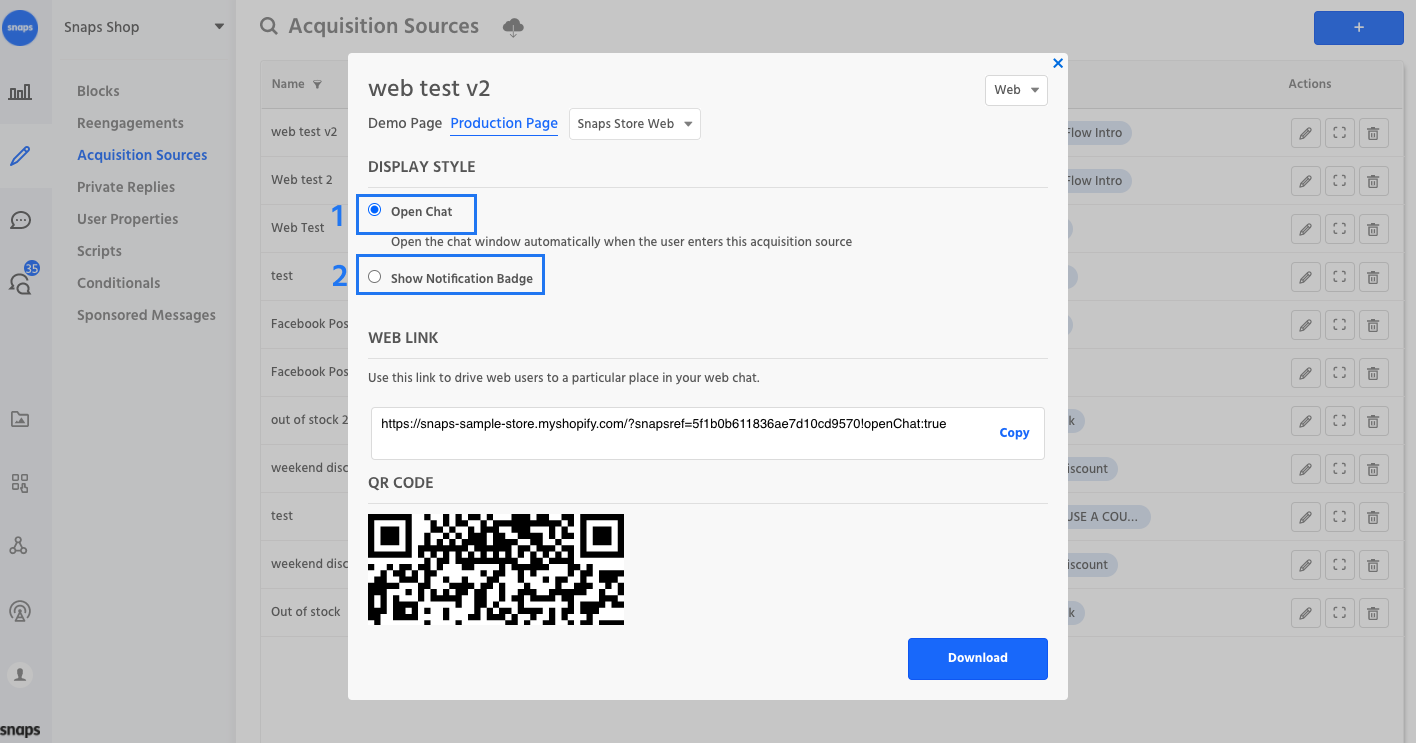
1. Open Chat - Selecting open chat will mean that the web chat will be open when a user navigates to the page via the Acquisition Source
2. Show Notification Badge - Selecting show notification badge will keep the chat closed and show an alert icon & the first part of your block's message.
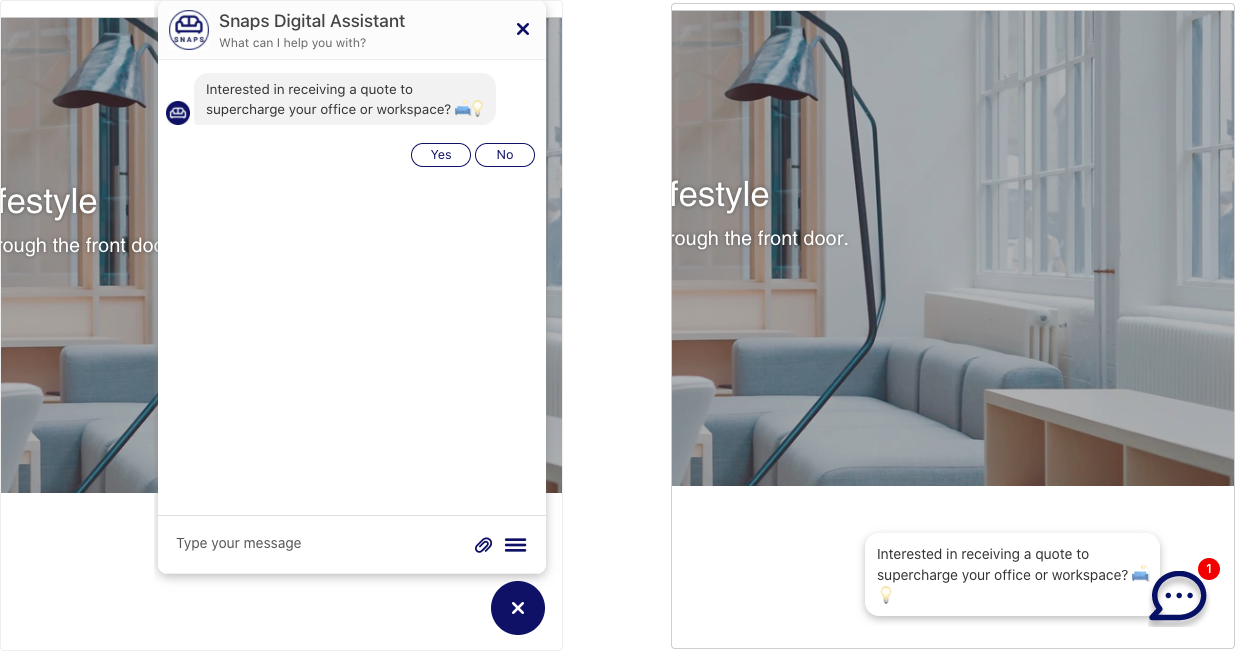
Open Chat (left) vs Show Notification Badge (right)
Configure Web Domain
For production channels, make you've configured a domain in your web channel form in order for the Web Link to work as expected. Demo channels will run on a chat-alpha domain.
Acquisition Sources on AdLingo
If you've configured an AdLingo channel, you'll be able to generate a unique code AdLingo code in your Acquisition Source form:
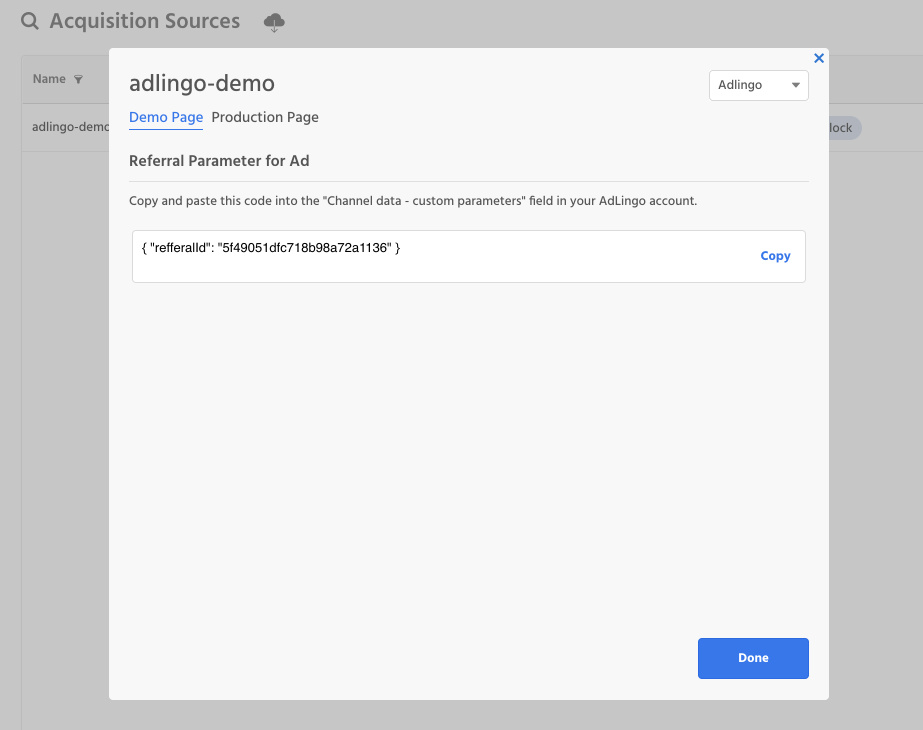
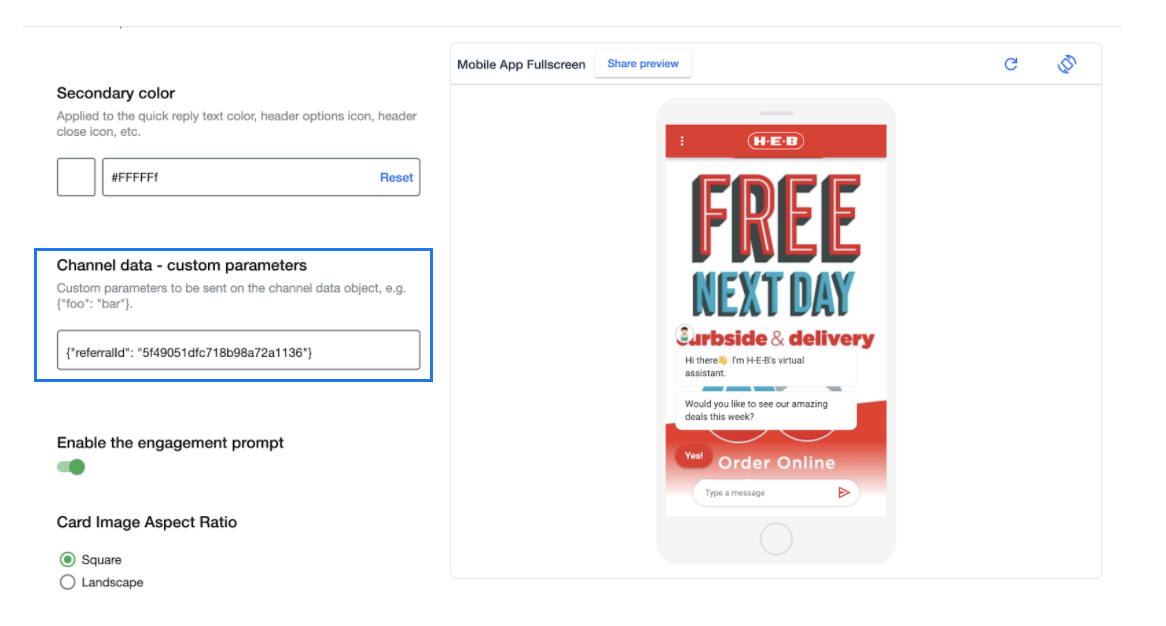
This code can be added in the Channels data - custom parameters field in AdLingo:
Optional: Adding Data Dynamically
In some situations, you don’t know what data you want to pass ahead of time and it’s not feasible to create links for every possibility. For example, perhaps you are promoting the bot on your website and you know what city and state a user is from and you’d like to pass that information into the bot so it can deliver the local weather. You can add additional user properties and their values to the end of your custom m.me links, and they’ll be set on the user as soon as they enter the bot. Links follow this format:
http://m.me/yourbrand?ref=12345!UserProperty1:Value1,UserProperty2:Value2
To learn more about user properties, refer to our User Properties
Updated about 1 year ago
