In order to deploy your bot on web, you'll need to configure several elements.
Setup
The setup form consists of demo channel and production channel options, and can only be configured when they channel is being set up for the first time.
A production channel is intended to be used by your customers and end users. A demo channel is intended to be used for internal testing of experiences before they're deployed to your production channel. Demo channel users will not show up in analytics, so your testing will not impact your production analytics.

Chat Locations
The chat locations section allows you to manage where your web chat will show up on your site. There are three default settings you can use to control chat placement.
Contains
The allow list and the deny list both require only a set up characters, not an entire url, to exclude or show chat. For example, this means you can enter only the word "checkout" to hide your chat from all pages where the url contains "checkout", or enter "FAQ" to show chat on all pages where the url contains "FAQ".
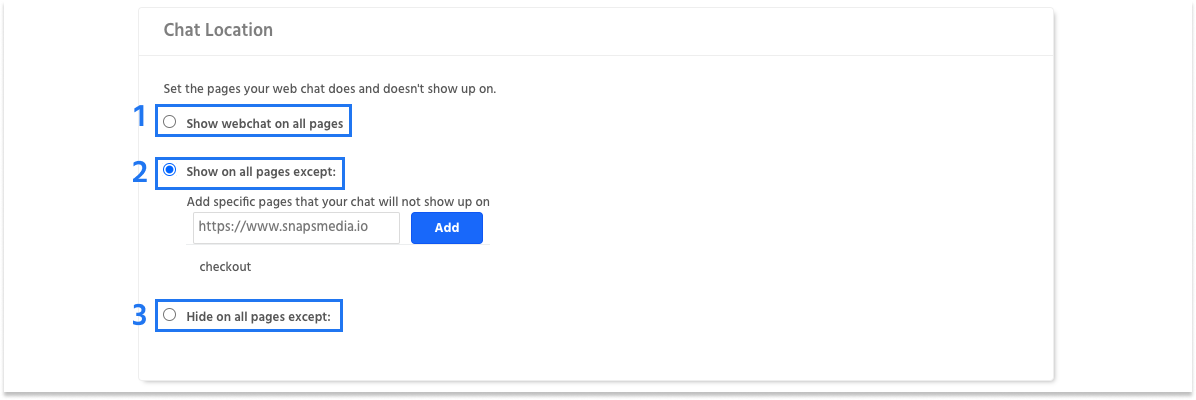
1. Show web chat on all pages - With this option your web chat will render on every page on your website.
2. Show on all pages except - This option allows you to list specific pages where your chat won't appear. You don't need to enter a complete url, you can simply enter a portion and the chat will be hidden from all pages where the url contains that portion. For example if you enter "checkout", the web chat will be hidden from any page where the url contains "checkout"
3. Hide on all pages except: This option hides chat from all pages except for those that are explicitly allowed. Similar to option 2, you only need to enter a piece of the url. For example you may want to enter "faq" to hide chat from all pages except for those that contain "faq" in the URL.
Basics
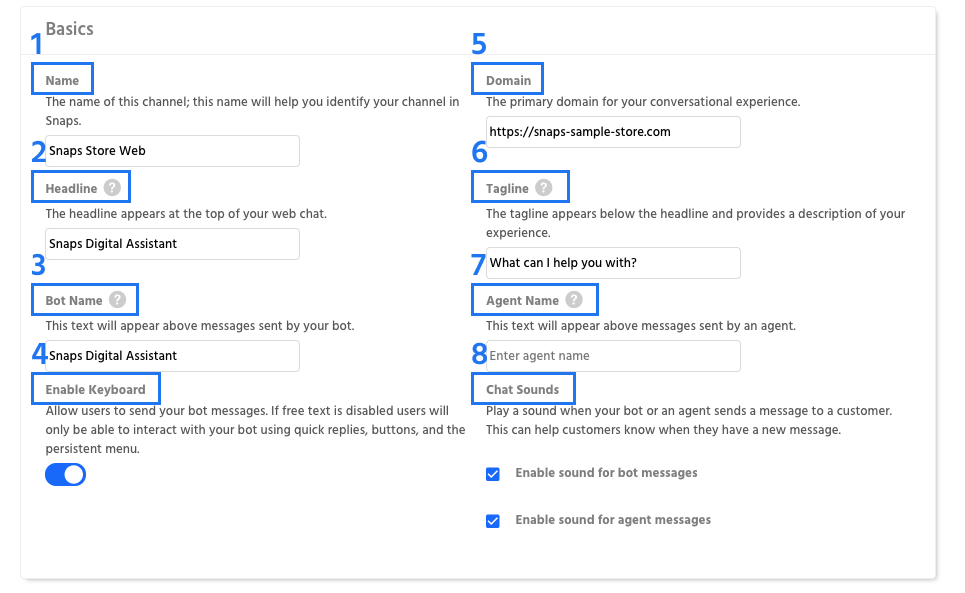
1. Name - The name of the channel for reference with Snaps, this is internal facing only and won't be seen by your end users.
2. Headline - The headline at the top of your bot, this field will be seen by your end users and is optional.
3. Bot Name - Add a bot name which will appear in all messages sent by your automated assistant. This can be a helpful visual cue for distinguishing your automated assistant from your human care team
4. Enable Keyboard - Choose to allow users to enter free text or limit them to only clicking buttons within your experience.
5. Domain - The primary domain your experience will run on.
6. Tag Line - A tag line appears below the headline and can offer explanation as to what your web bot is for.
7. Agent Name - Add an agent name which will appear in all messages sent by your care team. This can be a helpful visual cue for distinguishing your care team from your automated assistant.
8. Chat Sounds - Enable sounds when either a bot sends a message, or an human agent sends a message.
Persistent Menu
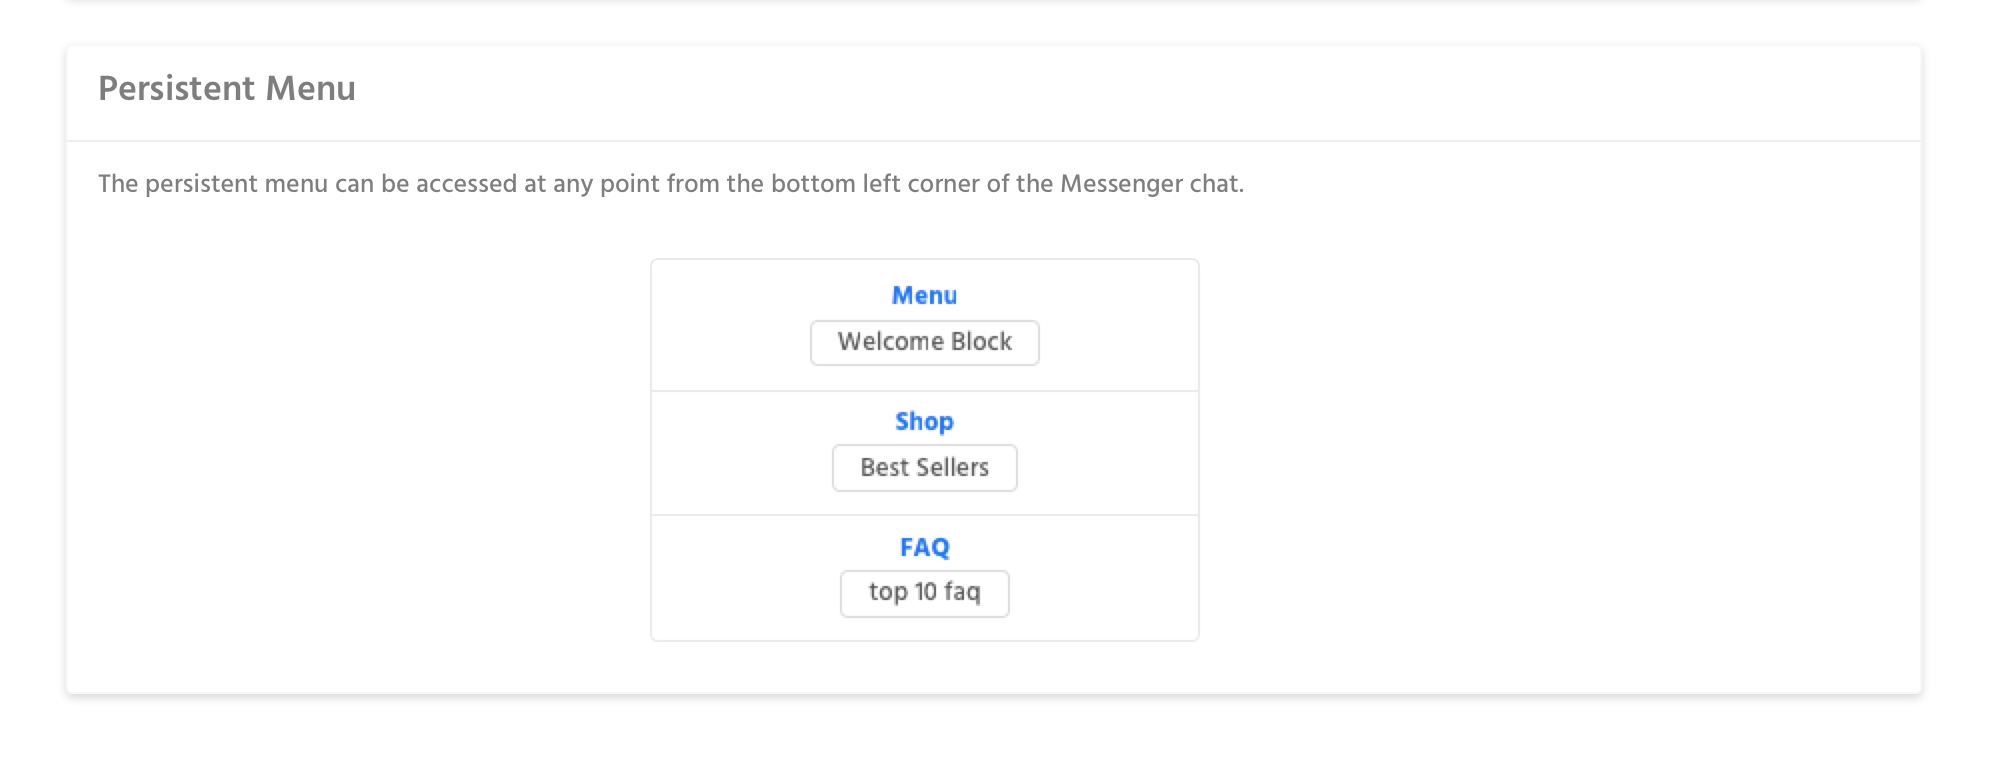
The persistent menu is a menu can be accessed at any point in a conversation by clicking in the bottom right corner of the messenger window. Creating a persistent menu is the same as creating any other message elements
Style
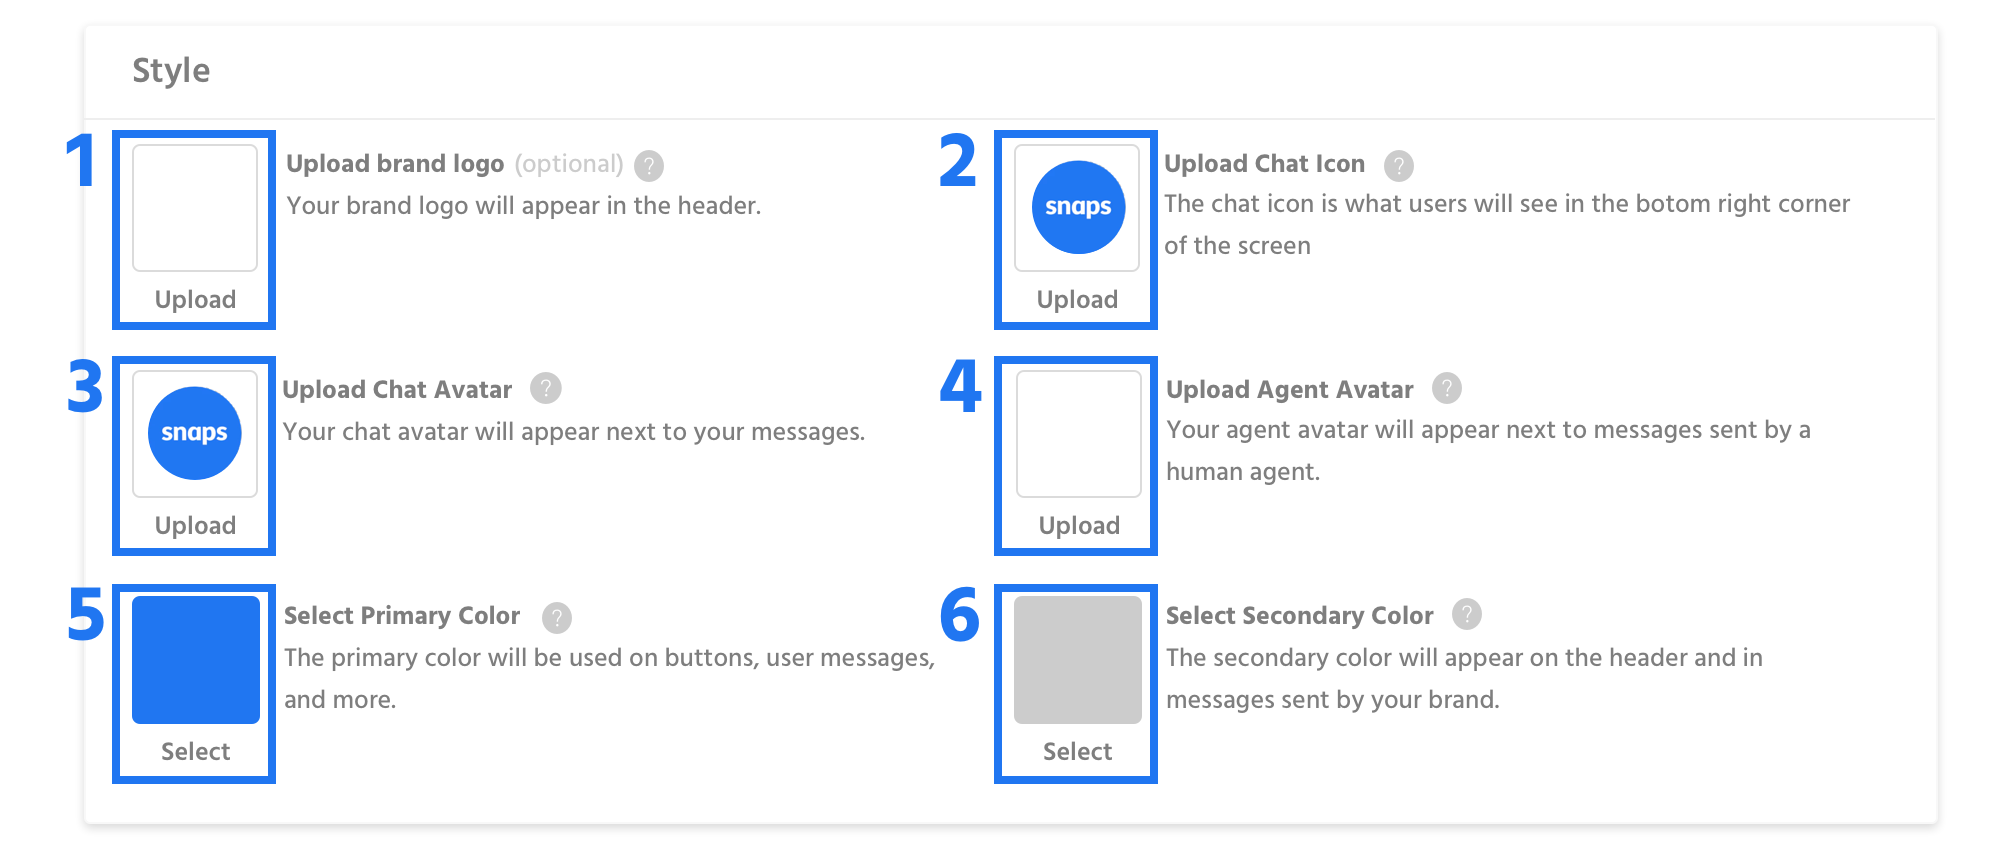
1. Brand Logo - The brand logo appears in the header alongside the Headline and Tagline, this field is optional.
2. Chat Icon - The chat icon appears in the bottom right corner of your website and is what users click to initiate a chat.
3. Chat Avatar - The chat avatar appears next to messages sent by your bot.
4. Agent Avatar - The agent avatar appears next to messages sent by a real customer service agent.
5. Primary Color - The primary color is used to style actionable elements, like buttons.
6. Secondary Color - The secondary color is used as a background in the header and in messages sent by you.
Notifications

1. Fade Notification Bubble - Determine how long your notification bubble shows for, if this is unchecked the bubble will not fade out until a user opens the chat or dismisses the bubble.
2. Show Notification Bubble for Welcome Block - Select whether or not your users see a notification bubble for your welcome message.
3. Show Notification Badge - The notification badge is a red icon that appears when users have an unread message.
4. Enable Sound for Bot Messages - Determine if you'd like to play a sound when the bot sends a new message.
5. Enable Sound for Agent Messages - Determine if you'd like to play a sound when a human agent sends a new message.
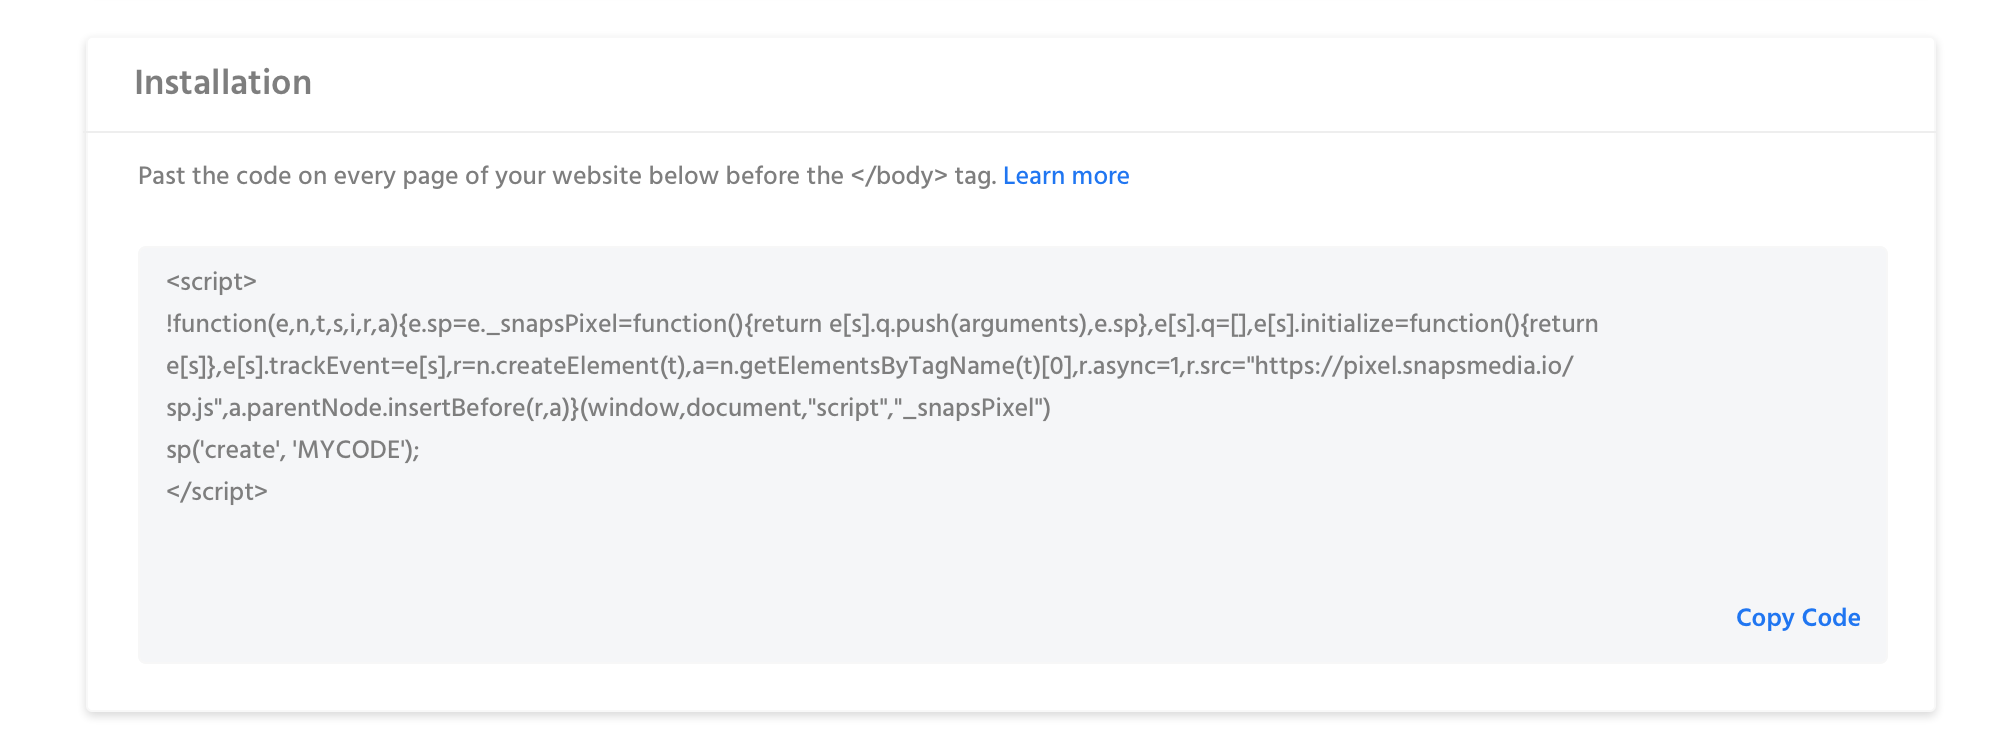
Installation
The custom code snippet that is generated for your channel, learn more about installing your web bot.
Security

1. Conversation Timeout - Set a timeout for conversations, after which point the conversation history will be erased by the bot.
2. Whitelist Domains - Domains that the webbot can run on.
Updated about 1 year ago
